
Emily got married last weekend!
During the wedding dress shopping stage, they were sending me pictures of any dress that she liked and we would quickly brainstorm what could be done to make the dress modest. She sent a few pictures of different dresses, and then she found THE DRESS. It was the perfect length and the bodice fit her like a glove. The only work that needed to be done was adding sleeves. Granted, that is a huge job, but it can be done!


She fell in love with the beading detail and the overall silhouette. Adding sleeves wouldn't be too much trouble because the front is not too low cut. I was confident right away that I would be able to create sleeves that would match the dress almost seamlessly. I did a similar alteration on a prom dress last year.
We had two fittings with a cotton mockup of the upper bodice. The first draft was way too big and the second one fit her almost perfectly. After making minor adjustments to the second mockup, I finally cut the pieces out of the white satin, using the cotton as the pattern and eventually the underlining.
The first change I made to the dress itself was to remove the beaded flap from the neck edge. Even though it was a gorgeous detail, we all agreed the dress would look better without it once the sleeves were added. Luckily, the beading extended underneath the flap so I didn't have to re-bead the bodice.
I wanted to reuse the beads from the flap so I spent a lot of time removing those.
Once the satin outer layer was attached to the lining and the finished sleeves were sewn on, I then pinned it in place on the dress.
After she tried it on one more time, I had a few adjustments to make. Once those were made, I had her try it on one last time! This time I was confident with the fit so I finally attached the piece to the dress. After that, I began beading!
The beading was easy, but oh so time consuming! I continued a border around the neck edge to make it look continuous. I also continued some of the bodice beading over the seam onto the shoulder pieces. This made it look as though the dress came with the shoulders and sleeves (I REALLY didn't want it to be obvious that sleeves were added).
After I finished beading, I hand stitched the lining fabric closed, added a few hooks and eyes, and it was finished! With not a moment to spare! Thankfully, she was a very easy-going bride so she didn't seem to mind too bad that I got the dress to her only a few days before the wedding.
I wanted to reuse the beads from the flap so I spent a lot of time removing those.
Once the satin outer layer was attached to the lining and the finished sleeves were sewn on, I then pinned it in place on the dress.
 |
| Shoulder pieces pinned to the dress ready to be fitted and sewn |
The beading was easy, but oh so time consuming! I continued a border around the neck edge to make it look continuous. I also continued some of the bodice beading over the seam onto the shoulder pieces. This made it look as though the dress came with the shoulders and sleeves (I REALLY didn't want it to be obvious that sleeves were added).
After I finished beading, I hand stitched the lining fabric closed, added a few hooks and eyes, and it was finished! With not a moment to spare! Thankfully, she was a very easy-going bride so she didn't seem to mind too bad that I got the dress to her only a few days before the wedding.
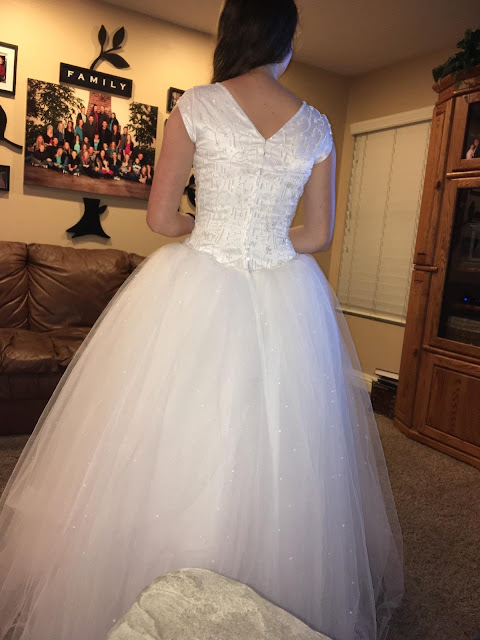
 |
| Days before the wedding. Its finally finished! |

I am so happy with how it turned out. I am so proud of the beading especially! I was sure to text a few update pictures to the bride as I made progress. This close up of the beading was one picture that I sent to her.
 |
| Some of the beading detail |

Congrats, Emily! So happy I got to be a small part of your big day! Now that I am finished, I think I might reward myself with a new dress...


