Felt Sea Creatures

Monday, November 13, 2017

Around the same time I made this, I also started to make a baby mobile. I really liked these ones so I started to make little sea creatures out of felt.


Now, nearly a year later, I still haven't done anything with them. I had five little sea creatures hanging from string just waiting to be hung on a mobile. Maybe it was because we have been sharing a room with Peter, or maybe its simply because I wouldn't know what materials were needed to make the rest of the mobile. Whatever the reason, they've been collecting dust.

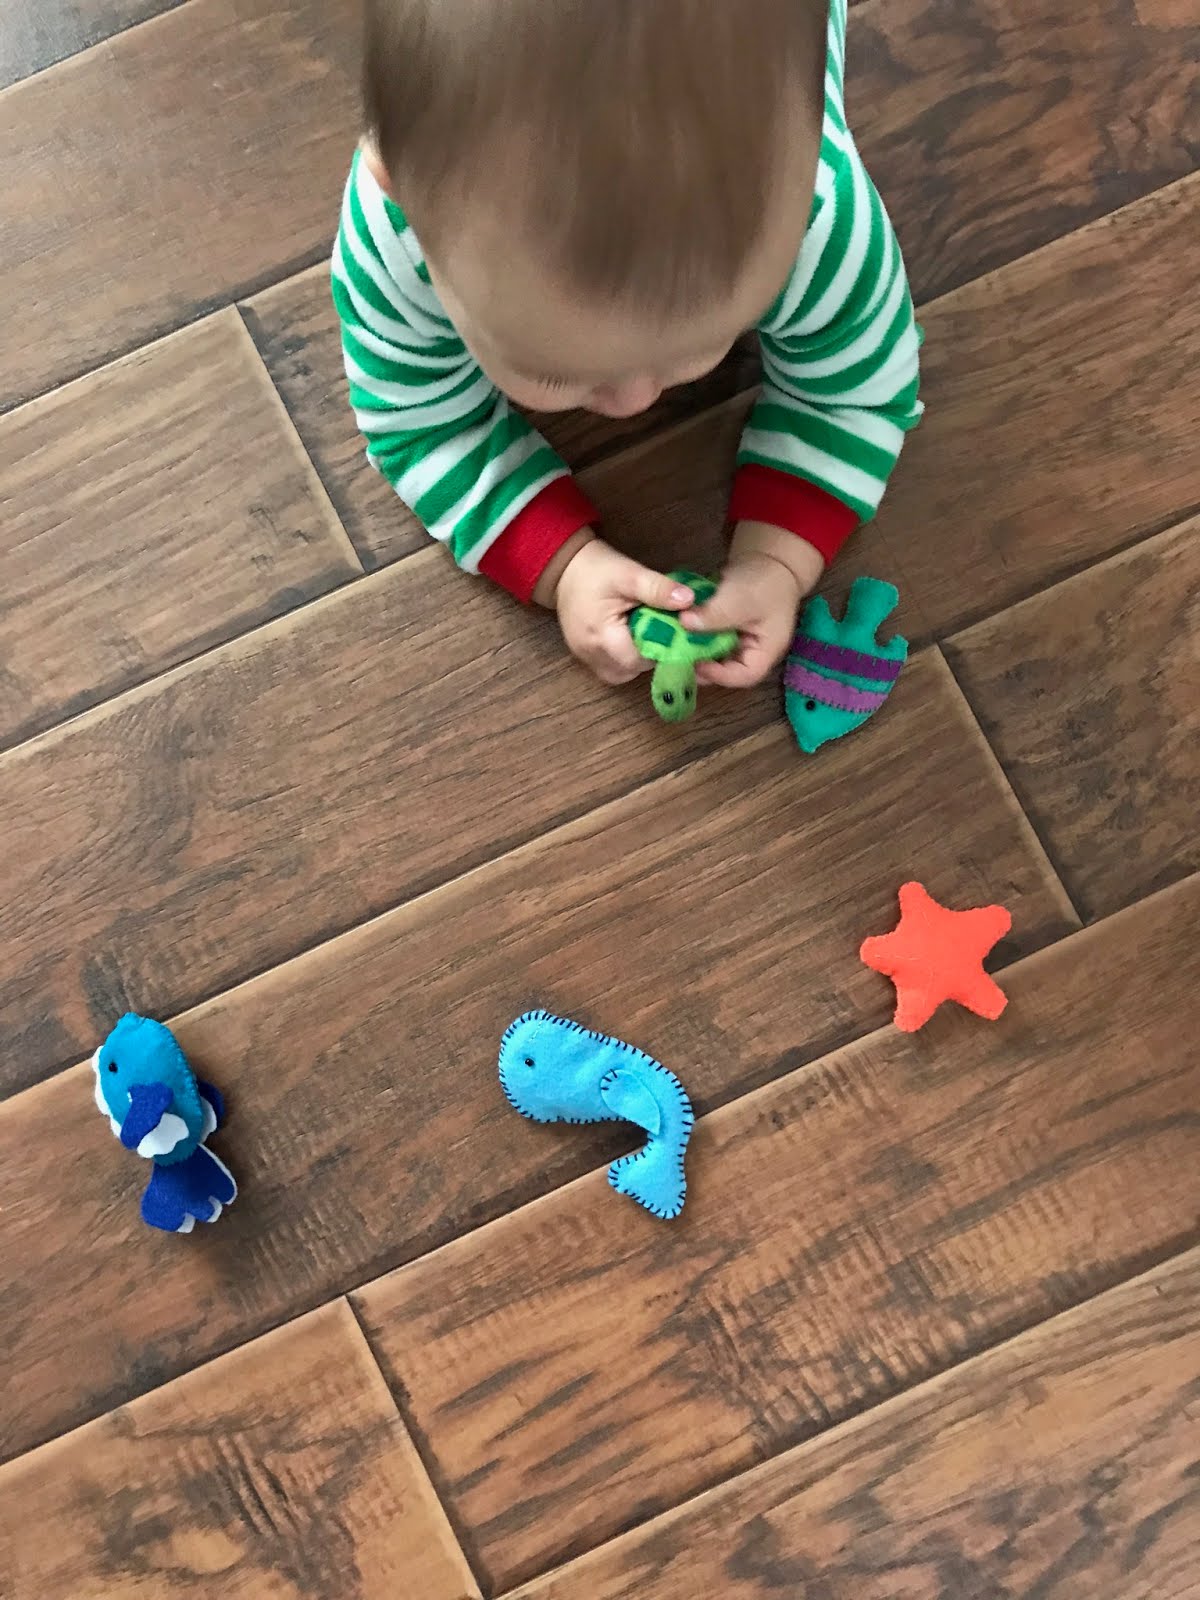
We are finally moving to a bigger place and Peter will be getting his own room! Long overdue. However, I still gave up on the mobile idea. Instead, I cut the stings off and just threw them into Peter's toy basket. He loves all the little toys that he can hold easily, examine, and (of course) put in his mouth! It makes me so happy to watch him play with these little creatures I made for him.

The turtle is his favorite so far! Also, Christmas jammies are fitting him early. He is growing too fast!
I made a whale, two types of fish, a starfish, and a sea turtle.
The whale was my first attempt. The shape is a little awkward, but I like the contrasting stitching. The turtle and the striped fish are my two favorites.


I plan on making Peter a lot more felt creatures. The next ones will be bigger and more three dimensional. 

Halloween: A Spider, His Web, and His Prey

Saturday, November 11, 2017

My first of many homemade halloween costumes for Peter!
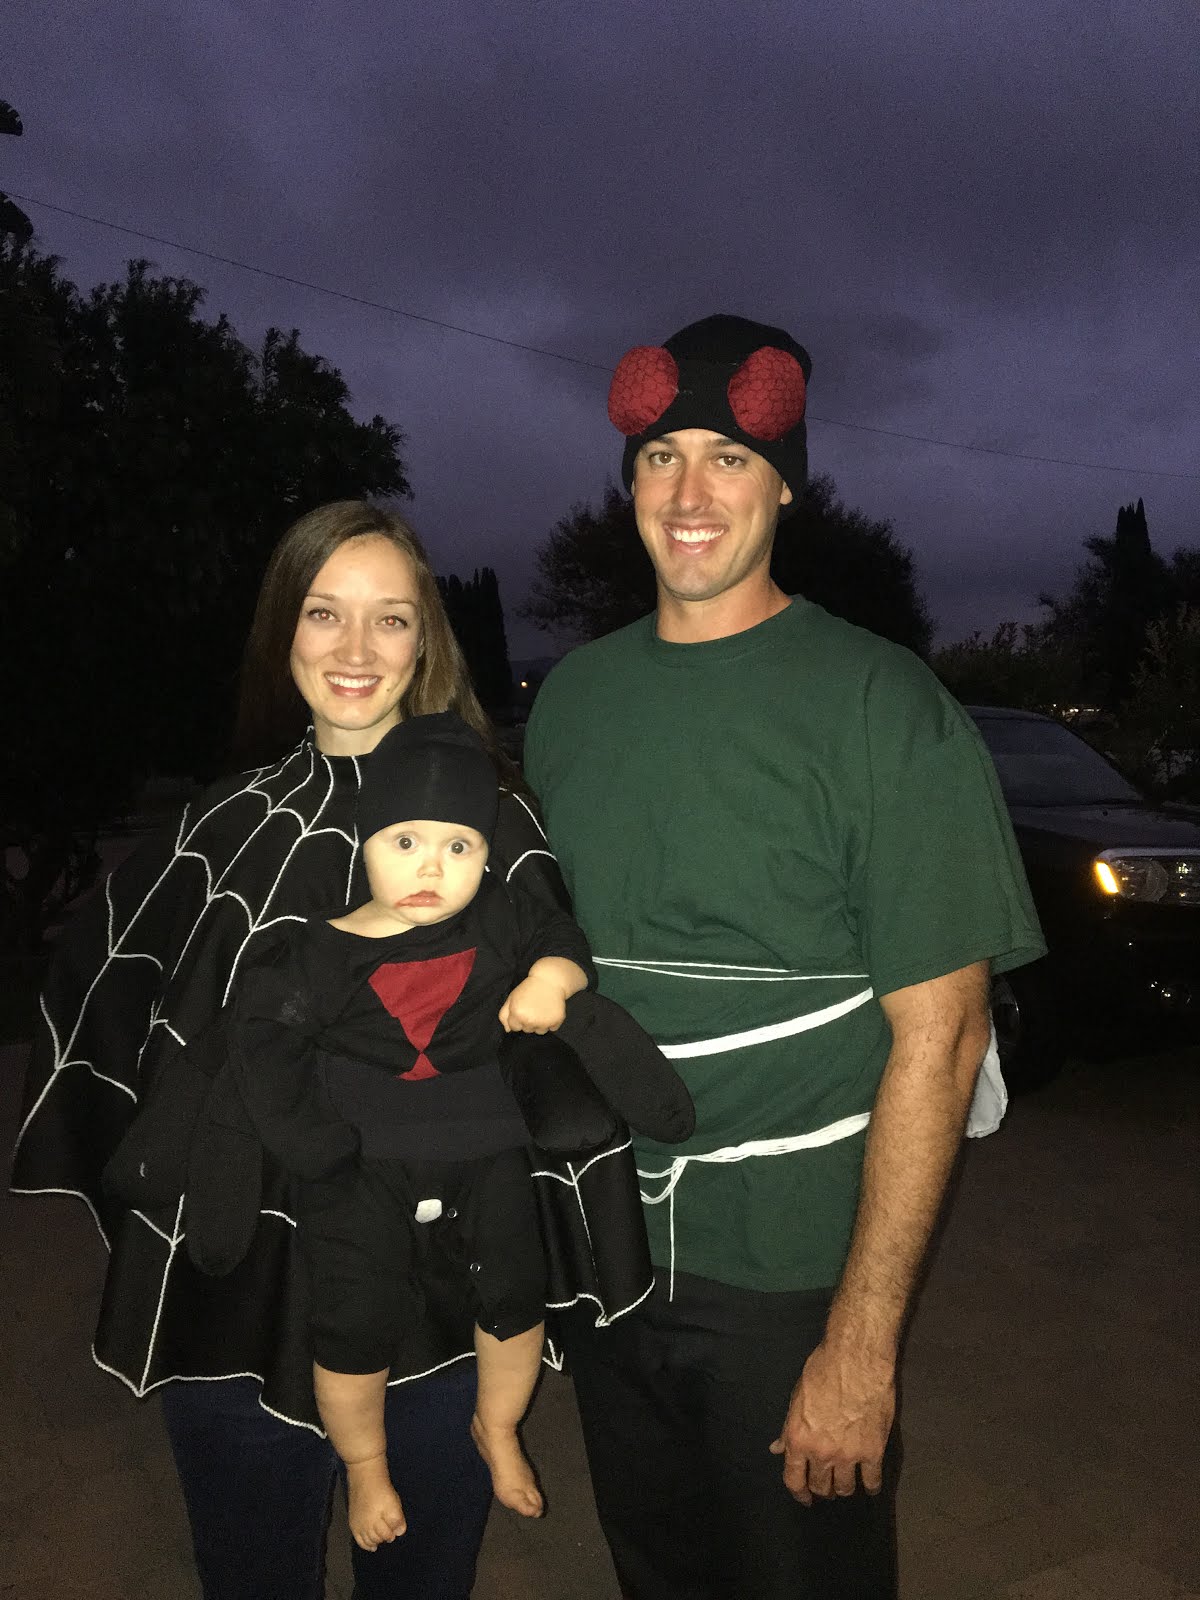
We decided to go as a spider, his web, and his prey.
Being in the pest control business, we thought the spider theme was a perfect choice for the family. 

I was so excited as soon as we came up with the idea for these costumes. The first thing I did was look through my craft and sewing supplies to see what I already had that could be used in making the costumes. I found some felt, some fabric, some wire, and some ribbon that I figured might be helpful.
I was able to make the wings with supplies I already had. I used some wire to shape them and then made the fabric cover out of white tricot fabric. I then used a black sharpie to draw the wing details.


Close up of the wing detail. Not perfect, but it turned out pretty good!
The wings would be pinned to the back of Jesse's shirt.
Next I made the fly's big eyeballs. I cut four circles out of a dark red fabric, the same fabric that I cut Peter's hour glass out of. Of the four red circles, two were bigger and two were a little smaller. I attached each small circle to a big circle, turned them right side out, stuffed them, and drew a honeycomb pattern on them. Then I glued them to a beanie. That was it for the prey's costume! 

For my web costume, I cut a giant circle from two yards of fabric to make a poncho. I cut evenly spaced curves around the edges and sewed white yarn around the whole outer edge and the rest of the poncho in the shape of a web. This was the most time consuming part of the process, but I think it turned out great.

I used the leftover fabric from the poncho to make the extra legs for Peter's spider costume.

I stuffed the extra legs and glued them onto a black outfit I bought for Peter.
I also hand stitched the hour glass onto the stomach.

It was so cute to watch Peter crawl around in his spider outfit. It is the perfect costume for a baby in the crawling phase.


All three costumes done!  Jesse is wrapped up in yarn as the prey. We even went a little farther and put a tiny bit of fake blood next to Peter's mouth and on Jesse's neck!
We got one quick picture on our way out to trick-or-treat, but mostly just to say hi to friends in the neighborhood. We got in the car to drive to a few houses and Peter fell asleep immediately! We visited one family and then went home. 
We are so excited for next halloween when we can take Peter trick-or-treating!

Linen Wrap Dress

Monday, October 16, 2017

My best friend is getting married in less than two weeks and I wanted to make the perfect dress to wear to her wedding. I've also been so excited for fall fashion and the colors that come along with that. I'm most excited about reds!

I found this pattern on sale (for $1!) and fell in love! I've been dreaming of wrap dresses lately for nursing convenience.
However, when I finally got the perfect orange-red linen/rayon fabric and had time to cut out the pattern, I noticed I got the larger sizes. Dang it! There was no way I would be able to grade the pattern to my size.
Since the pattern is normally $20, I figured I was better off just making my own similar pattern than buying a smaller size. I was looking forward to using a store-bought pattern (mostly just to see if I have the skills to follow a pattern, because I'm not so sure...), but self drafting is my jam and I am alway down to create a pattern!

A simple sketch I did a few months back of a wrap dress
I got started right away on making the perfect wrap dress pattern inspired by the one I bought. It took me ALL DAY to make it! My poor baby was crawling around trying to eat the tissue paper as I was drawing and tracing and calculating.
After cutting out the pattern, pinning it to the fabric, and cutting out the fabric, I spent a couple hours assembling the pieces. I was pleasantly surprised at how easy the assembly was. I think this particular pattern might have been my most well made one to date!

This particular wrap dress has a full skirt, bodice princess seams, and a beautiful tie around the waist.

I made sure all of the darts matched up at the waist.


At the neckline, I used bias tape to finish off the edge. It gave it such a nice, smooth finish that I wouldn't have gotten if I simply turned under the linen fabric and sewed it down.


To finish off the raw edges, I used a zig zag stitch on my sewing machine. None of my serger thread colors came anywhere close to matching the color, so this was the best option.


After making the dress and finishing off all edges other than the hem, I attached the tie and created a hole under the left arm for the tie to pass through.


Once I tried the dress on for the first time, it felt a little casual for a wedding. The linen fabric is very soft and has a cozy vibe to it (plus, it wrinkles easily), but once I dressed it up with heels and jewelry, it looked perfect for the wedding! I tested it out and wore it to church this weekend and I love the way it turned out!

Birthday Tie for Jesse

Wednesday, October 11, 2017

I made Jesse a tie a couple years ago and haven't made anything for him since (besides some minor suit alterations and patching a few holes). I've been planning on making him a tie for a long time. This new tie is long overdue.
He has been wanting some new ties recently, so I figured I would make him one or two for his upcoming birthday!

He has been noticing that bright floral ties are very popular lately. His tie he got from my brother is colorful and has some leaves and snails on it, but he has never had a floral tie.
I wanted to ease him into the floral trend with something fun, yet subtle.

When I said "subtle" I meant it! Hardly any flowers visible


My mom brought this fabric back from her recent trip to India. She got me a yard or two in a few different fabrics that are all so beautiful.
I've been waiting for the perfect project for this teal fabric.

The tan floral fabric I used for the lining was also from my mom's India trip
I used the same pattern that I have used for all of the ties I've made, including Jesse's first tie I made him. I think it is a great width for a tie.
I hand stitched the lining to the tie and also hand stitched the back closed. The reinforcement on the inside of the tie was from an old tie I got at a thrift store. I love to buy old, ugly ties and take them apart to reuse the interfacing.
I have grown to really like making ties. It only requires a little bit of hand stitching and some pressing and pinning. I will be making a trip to Goodwill soon to get some more old ties to reuse.

Patching Jeans

Monday, October 9, 2017

Throughout summer, I had one pair of go-to shorts. They are so comfortable, a length that I am comfortable in, and they are so cute!
The sad thing about them is that the holes are too big! Every time I put them on, unfortunately, my dang toes get caught in the hole and tear it a little bigger. They have gotten bigger and bigger and are now at the point where they need to be patched. Once they are patched, I will feel more comfortable in them and they will be more durable.


I love the distressed look and boyfriend fit of these shorts. However, the holes are a little too high up on my leg for my liking. Here is a before and after shot of the hole on the right leg.


I ironed on a large denim patch over the hole on the wrong side of the fabric. The large patch had a smaller patch ironed onto it in the exposed area of the hole. I stitched around the border of the large patch and then zig-zag stitched across the edge of the hole. Such a quick, easy fix!


Patching holes in jeans used to be the bulk of my project pile. In college, I would come home from classes some days to a pile of clothes that needed repairs sitting on my bed, most of them being jeans needing patches.
I lived in a house with eleven roommates and they kept me busy with projects!

Theme by: Pish and Posh Designs