Closet Case Pouf

Tuesday, January 29, 2019


As I sew, I toss my thread clippings and scraps of fabric in a bag. Every few months I take my bags of scraps to H&M because they recycle textiles. It feels like such a waste to throw it all away.

Recently, Closet Case Patterns released a floor pouf pattern that is the ultimate scrap buster! The pieces are cut from various fabrics and it is then stuffed with scraps!

I got cutting! I cut up so much of my larger scrap pieces and then I started to gravitate towards some fabric in my stash.
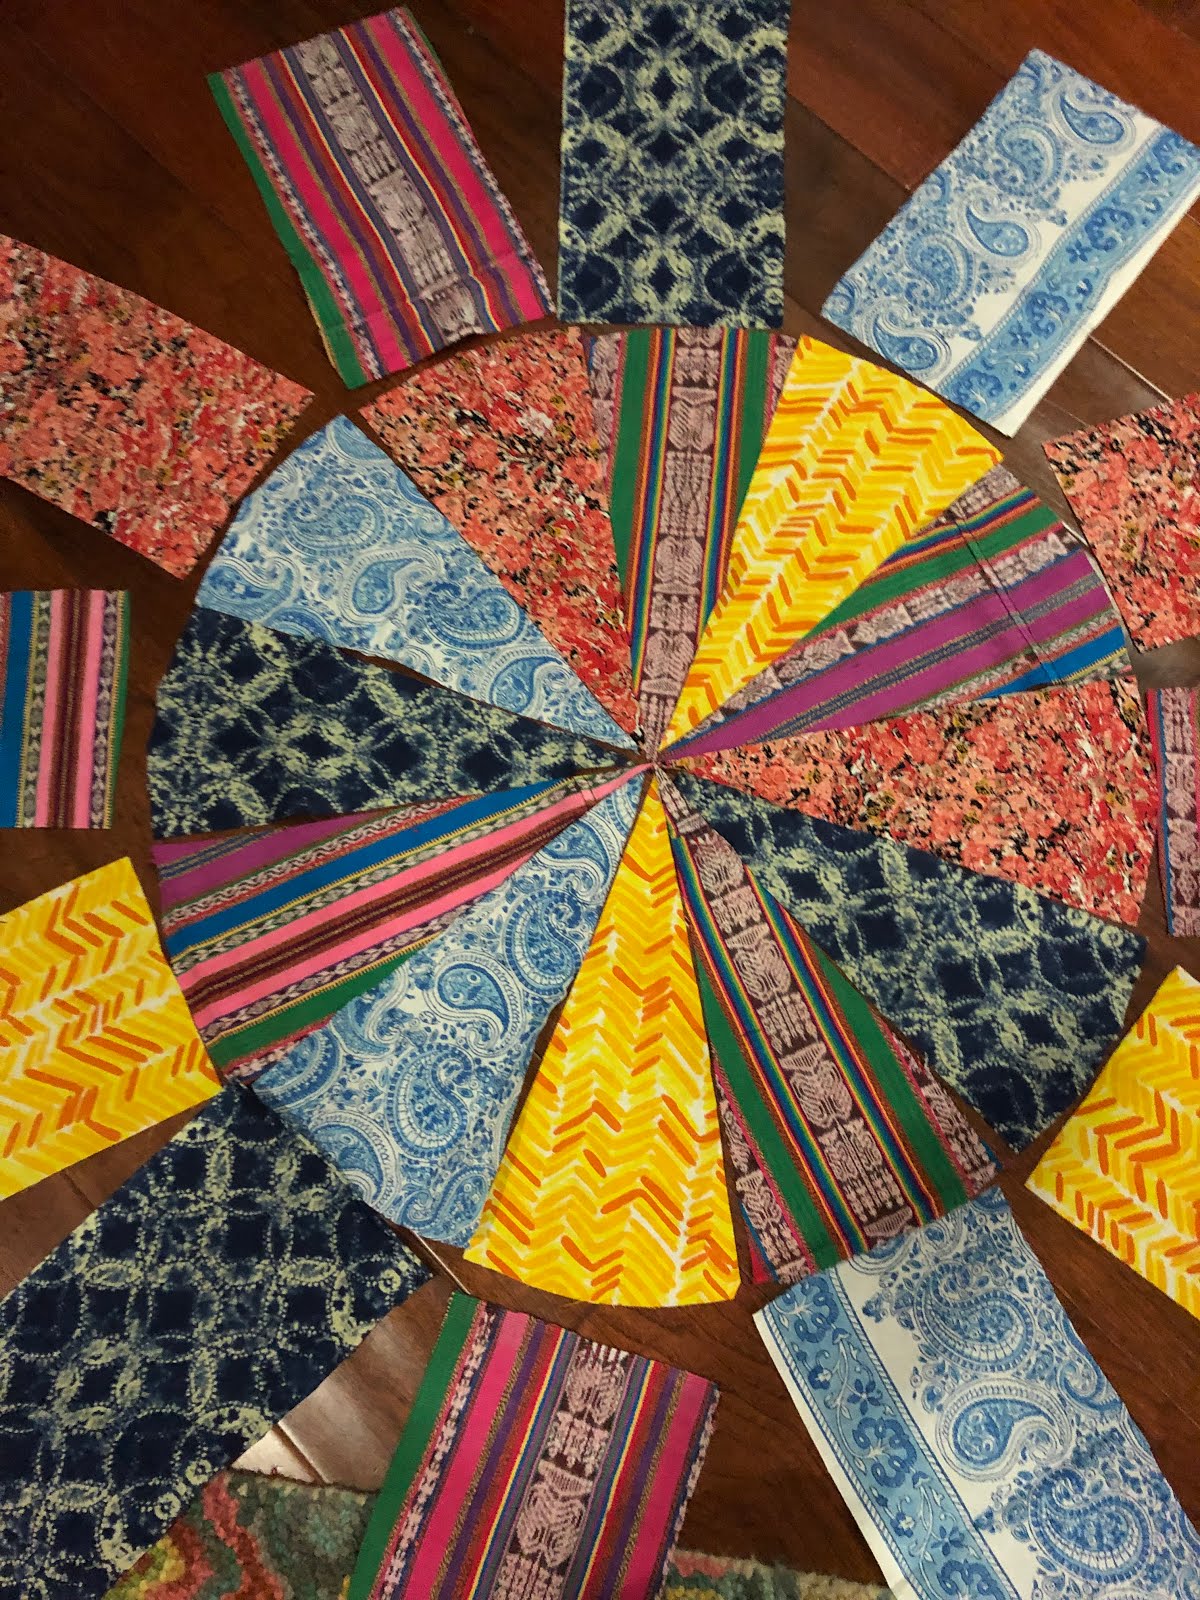
Testing out the different fabrics together
My stash of fabric isn't very big, but a large portion of it is colorful fabric that I had no plans for. 
My mom travels a lot and often brings home a yard of fabric for me, my brother, and my sister (we all sew!).
I thought it would be so fun to make a pouf for her with some of the fabric she has brought back from other countries.

Finalized the layout!
In the final selection of fabrics, I have included fabric from Guatemala, India, and Ethiopia. 
After interfacing each piece, I followed the instruction for sewing it all together.

Seams pressed 
I was tempted to leave out the piping, but I'm so glad I didn't. I purchased neutral piping for next to nothing and I feel like it adds more stability, reinforces the seams, and adds a cohesiveness to the project with its neutral color. 

The bottom piece is two half circles of the blue and white woven fabric with a zipper down the middle. 


Stuffing the pouf with all the scraps
My brother gave me his giant bag of scraps. before stuffing the pouf, I would have guessed we had too many scraps, but it proved to be just the right amount.
I quickly sewed together a drawstring bag with some more fabric in my stash that I had no plans for. it worked perfectly to hold the scraps and will make it easier when the pouf needs to get washed. 

The finished product! Photo from my Instagram
This little beauty will be heading to my mom's house later this week for my mom's birthday. I love handmade gifts, making them and receiving them! My mom is so happy and loves to wear bright, pretty clothes and she loves to visit new places. I think she will love it!

Goals for 2019

Wednesday, January 2, 2019


Happy New Year!
In 2018, I was more motivated and inspired than ever to create! I made 30 items for myself and 15 for others. I see no end in sight, so I am hopeful that 2019 will be another great, productive year!

I have three major goals this year in regards to sewing:

MORE PATTERN MAKING

I love pattern making! Up until May of this year, I made all of my patterns and loved it! Its so fun being able to come up with an idea, design it, and make the pattern. It is challenging and so satisfying. In May, I made so many items (inspired by Me Made May) and became consumed in the construction side of things rather than the design side. I want to start pattern making again so that I can exercise my own creativity. I don't want to lose the skills I have obtained.

Self-drafted dropped shoulder top with ruffle - one of my favorite makes of the year


MORE REFASHIONS

I have so many clothes in my closet that never get worn. Either they don't fit well, need a modification, or I feel to guilty to donate them. I want to go through my closet this year and make those items work for me (or for someone else!). 

A thrifted dress I've never worn turned into a True Bias Ogden Cami


NO BUYING CLOTHES

I participated in a Ready to Wear Fast for 2018. My mother-in-law told me she was doing it so I jumped on board too! At times it was challenging, but overall, I don't have the desire to purchase any clothes. I love being able to make clothes that fit and that I love. This year I want to challenge myself by making anything I might need (I'm due for some jeans and a bra).

Self-drafted skirt and self-drafted top

Gingham Crib Quilt

Monday, December 3, 2018

A few months ago we bought some new things for my son's room. His crib and dresser are light wood and his crib sheet is mint green with a white blanket. I loved everything together, but I needed to add a bit more color. I loved the idea of adding navy and a mustard or orange color.


I found the perfect grey, blue, and navy fabric at Super Buzzy in Ventura. 


I calculated how much fabric I had and how big I could make the quilt. If I did 4 inch squares (5" including the seam allowance), I could make a 45"x55" quilt, roughly the size of a crib quilt. 
I had just enough of each color to make this happen. I had a half yard of the grey and navy fabrics and one yard of the blue. Here is the gingham pattern all laid out:

Fabric all cut!
Once I had the gingham pattern sewn together, I started my search for the perfect fabric for the backing. 


I found the most perfect fabric at Joann. I fell in love with it right away. Its a white cotton with navy, blue, and mustard X's. The pattern is so simple and delicate, just what I had hoped for. It also made the decision easy for me: the binding had to be mustard!

My little helper!
The most time consuming part was stitching the straight lines on each side of each seam. It took a long time, but it was worth it. No other quilting technique would have don't this quilt justice. 

I found the matching shade of mustard quilting cotton from Quilty Pleasures

The "X" fabric perfectly matches the mustard binding and the blues. 
All finished! Just in time for the weather to get a little chilly! 
The best thing about quilts is that they get softer and softer with each wash. I've loved to watch my son grow attached to his new quilt. Every once in a while, he will drag it around the house with him after he wakes up from a nap and it makes my heart melt. 


Persephone Pants

Monday, August 27, 2018

My favorite (and most worn) make of the summer has been my Persephone Pants. I've worn them multiple times a week since I finished them.


I was debating between a few different patterns for a while. I wanted to make some cropped high waisted wide leg pants and I knew I wanted them in a cream/natural denim. 

I decided on the Persephone Pants by Anna Allen Clothing because they are so similar to the coveted Kamm Sailor pants:

KAMMPANTS
There are a lot of details about the Persephone Pants that I loved, such as the hidden button placket, the practically invisible front pockets, and no side seams.

The instructions were very easy to follow and it all came together very smoothly. I was lucky, in that I didn't need to make any fit adjustments to the waist or hips. 


Right after I finished them!
So happy with the buttons I used from my button stash
A few weeks after making the pants, I had the idea to check and see if I had enough fabric to make the shorts version. I did! I was able to whip up some Persephone Shorts with the leftover fabric. 


My handmade swimsuit and my handmade shorts

I went to the LA fabric district and found the perfect denim in a few different stores. My deciding factor was the price. I was able to get enough fabric for pants and shorts (3 or 4 yards, I can't remember) for $12. The cost of the pattern was $14, so total, I made a $13 pair of pants and a $13 pair of shorts. Not bad at all!
I get asked frequently if it is cost effective to make my own clothes. This is an example of how it can be very cost effective. I am lucky to be close to a major fabric district and, the more I sew, the more my skills develop! 

Avocado Pit Dye

Wednesday, August 22, 2018

I recently scored a pretty white shower curtain from a thrift store. I have saved some avocado pits recently and I knew I wanted to dip dye the shower curtain! I fell in love with dip dying last year when I transformed some dish towels and burp cloths.

Before...
After!


I referenced this blog post as I was researching the best way to dye with avocado pits. 
First, I submerged the pits in water in my largest pot (I wish I had a bigger one) and brought it to a boil. 


I then let it simmer for an hour. The pink color became apparent rather quickly and got darker and darker as it simmered. Then I let the dye sit overnight. 

Ready to go! Notice the dark pink color of the water
In the morning, I scooped the pits out of the water and brought the water back to a boil. I then got the bottom portion of the shower curtain (the portion I wanted to dye) wet. I then turned off the heat on the dye bath, submerged the wetted portion, and secured the rest of the curtain out of the way. 


I frequently moved the curtain around so that it would stay submerged. 
I left it soaking for about two hours.


I wish I had left it soaking longer! I think my dye bath had the potential to produce a beautiful, dark color because I had so many pits. 
I will definitely be doing this again! Just need a bigger pot... Such a cool experiment. I would also love to dye with yellow onion skins and tea. 


Theme by: Pish and Posh Designs