This is a sponsored post written by me on behalf of Cricut. All opinions are 100% mine.
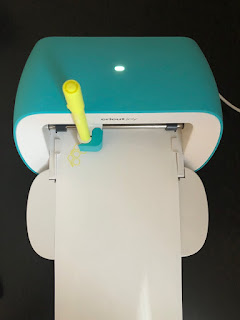
 Cricut recently released a new machine, Cricut Joy! I love this machine because I don't have a craft room, so having a smart cutting machine that is small and portable works really well in my tiny workspace in the corner of my bedroom. No need for mats plus a smaller machine and materials makes storage really easy. I am easily able to plug in my machine, connect through bluetooth, and start making!
Along with the Joy, I also have a Cricut Maker machine, which has its own cool features. However, the Cricut Joy allows for unique creative possibilities. I am so excited to share a few simple projects with you and hopefully inspire you to create with Cricut Joy as well!

BABY ONESIE IRON-ON

My first project was a Smart Iron-On project for my newborn son. I wanted to make him a cute onesie with this beautiful patterned Natalie Malan Aquamarine Smart Iron-On I found. The only other supplies needed for this project are the blade and the Starter Tool Set.
I designed a simple "Baby Bee" file using a bee image and font available in the design space. I especially love this design because my husband and I are beekeepers, my son's name is Bennett (Baby "B"), and at my bee themed baby shower, we referred to him as "Baby Bee." How perfect is that?!
You can find my "Baby Bee" file here.
Helpful tip #1: When it comes to Iron-On projects, don't forget to select "mirror" when reviewing your project (as pictured below in Design Space).

Helpful tip #2: Remember to place the Smart Iron-On sheet face down.

One of the Cricut Joy machine's coolest features is that mats are optional! You simply feed the Smart Iron-On sheet directly into the machine. This makes it cheaper, faster, and simpler to create beautiful things. Check out the brand-new materials specifically for this machine that do not require a mat here.
Using the tools in the starter tool kit, I gently peel away the extra pieces around the cut image.

Helpful tip #3: For a cleaner transfer, preheat the fabric before placing your design (as shown in the image below). Although I only have an iron, using a Cricut EasyPress is the ideal way to transfer an Iron-On image.


Once it is pressed and has cooled completely, gently peel away the tape to reveal the finished product!
This project came together in only about 15 minutes. The material is so easy to load and the design space is super user-friendly. It walks you through each step of the process.

JAR LABELS

The second project I made with my Cricut Joy was a honey jar label using Smart Label Writable Vinyl. Smart vinyl comes in extended sizes, with up to 20’ repeated cut capability. That means no switching out mats, making things faster, cheaper, and simpler.
Although we have only been hobby beekeepers for a year and a half, we hope to harvest some honey this summer! If all goes well, the bees will be thriving and there will be more than enough honey for us to take some. I've been wanting to design honey labels for a long time now, and the Smart Label Writable Vinyl inspired me to finally do so!
I was able to create the image using a hexagon shape, an image of a hexagon pattern, an image of a bee, and font all available in the Cricut Design Space.
You can find my honey jar label file here.
I used an infusible ink marker, which is meant to be used on a fabric base, but I loved the yellow color and tested it to make sure it wouldn't bleed or smear on the Smart Label material. The other materials needed for this project are a fine point pen in black and the Cricut Joy blade.
Another great feature of the Cricut Joy is that it only has one tool clamp. When you begin a project, Cricut Design Space tells you what material and tool to load in the machine. With this particular project, it began with the yellow infusible ink marker (as pictured above) and it prompted me when a tool change was required. You simply change out the tool, Press "go," and it continues the next step of the design.
Check out the Cricut Joy-compatible pens here.

Next, the black fine point pen is loaded.

And finally, the fine-point blade is loaded.


Smart Label Writable Vinyl is my favorite of the materials specifically for Cricut Joy. I plan to use it to label honey jars, homemade jam jars, pantry organization labels, and so much more.

GREETING CARD

Another quick and easy project with the Cricut Joy is greeting cards. Cricut Design Space has tons of cute card designs and there are so many cute insert card sets available.
This was a project that I was able to do with the help of my three-year-old son. He has really been missing his babysitter during this social distancing time, so we decided it would be a fun activity to make a cute card to mail to her.
The materials needed are the card mat, insert cards (we chose the cream and gold insert cards), and the blade.

After much deliberation, my son decided on the Elephant Confetti Card. We figured it would cheer up anyone who might be feeling down during this difficult time, and it would be so cute with the gold card insert.

The card mat is very simple to use and is exclusively for use with Cricut Joy machines.

Once the design was cut on the cream card, I removed it from the card mat and inserted the gold paper into the slots in each corner, resulting in this cheerful little card!

These projects were so much fun to make, and I especially loved being able to design the "Baby Bee" onesie and honey labels. Cricut Joy is the perfect compact smart cutting machine. In my opinion, the exclusive Cricut Joy materials is what sets this machine apart.
My favorite things about Cricut Joy from doing these projects:
- projects can easily come together in a matter of minutes
- the machine is easy to store and quick to set up
- the new Cricut Joy materials that don't require a mat are so easy to use (and are so cute!)
- the card mat makes card making so easy
- the Cricut Joy projects available in Cricut Design Space are so cute and inspiring
Check out cricut.com to learn more about this machine!
https://cricut.com/en_us/cricut-joy-products.html?utm_campaign=cj&utm_medium=referral_influencers&utm_source=kathrynkempler.blogspot&utm_content=CricutJoy_pfp&utm_term=