Graduation Dress

Tuesday, December 20, 2016

I graduated from college three years ago today! College went by in a flash, and so has life after college. Being an adult is hard work sometimes, but so far I've loved each phase of life more than the last!
Not a great shot of the dress, but the only pic where I'm not bundled in a coat and beanie!

I made myself a maroon dress a few years ago in my pattern making class. I'd hardly worn it at all, but I decided it was the perfect dress to wear to graduation. In the dead of winter, maroon was a fitting color. Plus, it looked amazing with my new cream coat, a graduation gift from my parents!


Also, I still miss working at the costume shop.

Another Color Block Sleeper

Friday, December 16, 2016


I just can't get enough of these color block sleepers! They are so easy to make and so adorable!


My knit collection is still pretty extensive, especially my blue color options! I think a huge part of why I love making these is because I just want to use up the fabric I have stockpiled! 

My sister and I noticed with the one I made my nephew Freddy that the fit was not perfect. It was extra wide and a little short, even on a normally proportioned baby. 
I'm used to adjusting patterns for myself, but I'm a little nervous to adjust my pattern for this sleeper. This latest one I made is the same old pattern, but for any future sleepers I will try to lengthen it a bit for a better fit. Besides, a better fit means it will fit the baby longer!! 

Leather Baby Moccasins

Thursday, December 15, 2016

On my last LA fabric shopping trip in June, I bought a few pieces of leather with plans to make some baby moccasins!
The two leather pieces I bought were each no larger than a square foot and cost a few dollars each.
I searched online and found this tutorial and this pattern. It was so easy to follow and i made my moccasins in under an hour. 
They should fit baby Kempler at about 6-12 months old!


I was pleasantly surprised with the outcome! Not too shabby for my first attempt at sewing with leather. 


This project was risky because I used a regular needle, not a leather needle. Nothing broke, thank goodness, but I may buy a needle specifically for sewing with leather if I plan to make more of these. 
When sewing with leather, you can't make mistakes! Threads create permanent holes in the leather and stay there even when a seam is unpicked. 

I am so happy with how they turned out. I think I will grab a whole lot more leather when I head back to LA.

Little Fish Apparel

Tuesday, December 6, 2016

My mother-in-law and sister-in-law are amazing seamstresses. I love fabric shopping with them and brainstorming project ideas together.

Here we are on our latest LA fabric district trip a few months ago!
Baby Kempler was a little grain of rice back then, even though I didn't know it yet!

My sister-in-law Rachel recently launched her business Little Fish Apparel. They sell the cutest little euro style swim trunks for boys. The cut is so stylish and the simple fabrics are so cute and classic. 
She is such a talented seamstress and pattern maker (she makes her own patterns)!


Rachel says:
"I started Little Fish when I couldn't find the options I wanted for my boys in stores. Swimsuits for boys are typically bulky, uncomfortable, and there aren't many variations. So Little Fish was born."


Using the coupon code SAVE20 will get you 20% off from now through the end of the year!

Little Fish on Instagram

Check out their website!


Christmas Project: Felt Ornament

Monday, December 5, 2016

I recently bought a stack of craft felt for a few projects I've been wanting to try. I've loved this little ocean creature mobile for a while now, so I've been attempting to make something similar (pictures to come).


Later this week I'll be attending a Relief Society ornament exchange activity. After looking at the store for an ornament to purchase, I decided to try making one!
I'm not a money spender, and I know the decision to make an ornament cost me a lot more time, but I feel better for using what I already had and for avoiding an $8 charge! 
Lately, my creative moments are few and far between, so when this rare urge to make something comes to me I don't ignore it. 

A few of my other supplies: thread, craft string, ribbon, and beads!
After a few long hours, the final product turned out better than I expected!


I made a round (squat) ornament with six segments, alternating red and pink. It is stuffed with cotton balls. The hook and hanging tassels are made of teal and red craft string. I also used small gold beads to add some detail around the ornament. 

I also made a felt sprig of mistletoe! 

I also plan to include this felt sprig of mistletoe with my wrapped ornament. I figured that some poor soul is going to be stuck with my homemade ornament. The least I can do is add a bonus gift!

Baby Blessing Dress

Monday, November 21, 2016

In my children's clothing class in college, one of the assignments was a baby blessing dress. I won't get any use out of it any time soon, but I am saving it for my baby girl some day!


I used two types of white tricot fabric: sheer and opaque. The bodice, sleeves, and both skirt layers all have sheer tricot laying over opaque tricot. The two layers gives the fabric a really pretty sheen. 

Tricot is perfect for a blessing dress because it is super soft and stretchy.


The two long skirt layers. Each layer is finished off with thick satin ribbon. 

I wasn't sure what embellishments/trim to add to the dress at the time. I'm glad I kept it simple because my style is always evolving and my options are endless! I can always add lace or more ribbon later. 

My First Swing Dress

Friday, November 18, 2016

Last year was my first attempt at a swing dress. I bought this super thick, soft light blue knit fabric. 
I made a few mistakes along the way, but I fixed them with the second swing dress I made. 


The fabric was a bit too heavy and it still shrinks with each wash! It is a much different shape now than it was at the beginning. 
It is more form fitting on the upper bodice than I had intended and the hem droops at the side seams. 
I've always been taught that you should let a dress or skirt hang for a while before hemming it, but I never have the patience! Therefore, my hems are often not straight..

I love the way the neckline turned out and I love the length of the sleeves. 


I learned that for the desired look, I needed to add fullness to the center back with a seam. 
It ended up being a great summer dress for nights out or days at the beach. 

With my family at the Hollywood Bowl summer 2015

Swing Dress Pattern

Wednesday, November 16, 2016

In a previous post, I showcased a swing dress I made for Easter. I still wear it regularly and plan on making ten more of them. My sister Rachel recently made herself a swing dress and she asked to see a picture of my swing dress pattern. I took a picture of the simple pattern just to give her an idea of where to add fullness.


When it came to cutting out the fabric, I ended up cutting the front and back pieces wider than the pattern showed. I used all the width that the fabric would allow. These pattern pieces were just a guide in getting the shoulders and neckline the right shape. When it comes to a swing dress, you can't go wrong if you just add as much fullness as you can starting under the arms. 

I also decided to make the back two separate pieces with a seam down center back. This is how I added so much fullness to the back.
I learned from the mistakes I made on a previous swing dress. I did not add the center back seam on the first swing dress I made and all the fullness was in the side seams. I wanted to add more to the sides and the back for extra fullness. 

The hem looks uneven, but I cut it so the back is slightly longer than the front. You can also see all the fullness that the back of the dress has. 

Baby Kempler!

Tuesday, November 15, 2016


BABY BOY KEMPLER DUE IN MARCH!

We can't wait for this sweet baby to arrive! I have been so busy lately that I haven't had time to sew anything new, but now that my body is so rapidly changing, all the more reason to sew for my baby!


This picture was taken the week we found out we were pregnant (in July). I was so convinced there was already a bump, but there definitely wasn't one yet!
I love sewing for babies and I'm so happy that I now have the perfect excuse to do more of it. I love the soft knit fabrics and the fun colors that come with children's clothes. Plus, they are always comfortable, durable, and easy to clean. 

The same week we found out we were pregnant I went through my fabric stash and pulled all the knit fabrics. I have a pretty good stash already, but I'm sure it will grow over the next few months. 


My mother-in-law gave us this little dresser for the baby's things. I immediately found the right corner for it and filled it with the few things we already have.

 
Now THAT is a bump! This was taken in October right around our half way mark! 

Patterns

Saturday, July 9, 2016

My pattern making process begins with the idea, inspiration, or sketch. When I see something I like or imagine a piece of clothing I want to make, I immediately think about the pattern. I try to picture what the pattern pieces will need to look like in order to get the look and fit I want. 


I made these slopers in my Fitting and Alterations class in college. We got basic store-bought patterns with bodice front and back pieces, skirt front and back pieces, and a sleeve. We also did the same for pants, but I have yet to use those slopers.. My body has changed a lot in the last few years since making these and I'm afraid they won't be the right fit anymore. 
We cut the pattern pieces out of cheap fabric and used markers and lots of basting stitches to get the perfect fit. Among other things, I matched the waist line to my exact waist, I moved the shoulder seam to the perfect place and I adjusted all the darts. Once I got the right fit, I transferred the patterns onto card stock. Now they are durable and ready to be used over and over again.

The most important tool in pattern making is the tissue paper! A few years ago, I went to a medical supply store and purchased a roll of tissue paper that is used to cover patient's beds. Best purchase I ever made!


Along with tissue paper, I also use a ruler, gridded cutting board, tape, scissors, and a pencil. 
I still refer to my old pattern making textbook regularly.


It gives instructions for everything: adjustments for knit slopers, all kinds of sleeves and necklines, changing the type of dart, the shape of the skirt, you name it!

I try to create variety in the clothes I make for myself. I am drawn to simple fabrics, usually solid colors. I try to make something unique and different each time, especially when the fabric is simple. I recently made a wrap dress and that was a new experience for me. I had never made a wrap dress, never tried flutter sleeves, and don't have much experience with chiffon. It was so fun to try something new, and I referred to my book for pattern adjustments along the way. 


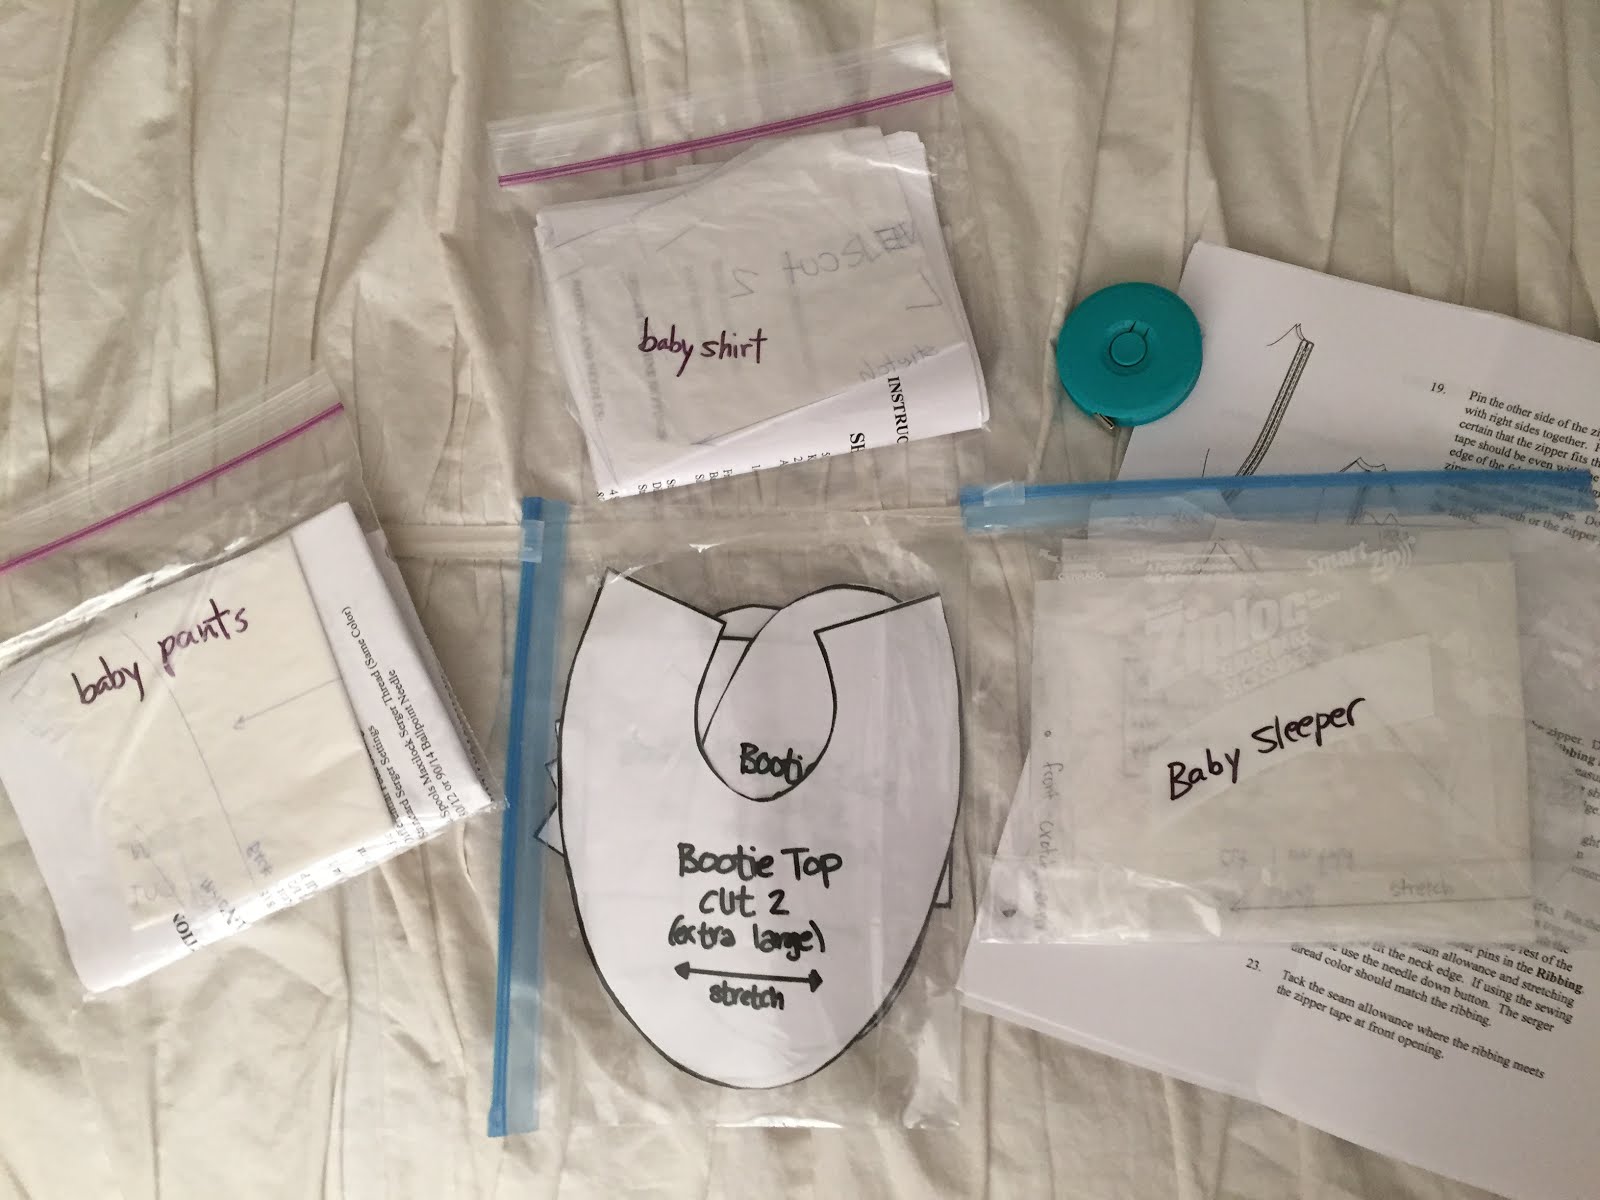
Once I've made and used the pattern, I store it in a plastic bag, give it a name, and store it away in my overflowing drawer of patterns. 
I prefer making my own patterns over using store-bought ones because mine are simpler to use, they fit me perfectly, and it allows me to design my own wardrobe!

Embroidered Rooster

Tuesday, June 28, 2016

Im my textiles class, one of the projects we did was embroidery. It was toward the end of the semester in December and Christmas was right around the corner, so I made a Christmas present for my mom.
Her kitchen is gorgeous, and every once in a while she tosses in some kind of farmhouse design element. She loves roosters, so naturally I embroidered a rooster on a dish towel for her. It was the perfect gift, because she also loves dish towels! Growing up, we weren't allowed to use any of her dish towels for anything except drying hands. They were all too pretty. 


It was a time consuming process! The tail was my favorite part. I only had four different colors, so I had to get creative and combine threads to create different colors. 


I wish I would have embroidered his whole body, instead of just outlining it. Overall I was happy with how it turned out. 

Once I gave this towel to my mom, she announced a new rule to the family: no using this dish towel, not even for drying hands. It is strictly decorative. I was honored!

My Favorite Green Top

Monday, June 27, 2016

Like I mentioned in this post, I recently inherited a ton of fabric from my Oma, and I am in fabric heaven!
When I see or feel a piece of fabric, I almost immediately come up with a plan for what to make and how to make it.
In the box of fabric, there was a small cut (less than a yard) of kelly green polyester knit. I have always wanted a top with a straight hem and side slits, but all the ones I find at stores have slits that go as high as the bust line! So I made a pattern for my own.


The pattern is super simple. The back is slightly longer than the front and from the bust dart, the side seams go straight down.

Just after finishing
I was too bashful to get anymore pictures, but her is the side view of the side slit!
I love this top so much. I shamelessly wear it every week! Its stretchy and comfortable, but it looks like a nice blouse. It is easy to dress it up or wear it casually. 


Wrap Dress with Flutter Sleeves

Sunday, June 26, 2016

Last week I went into LA with my mother-in-law and sisters-in-law to do some fabric shopping. I only had $40 with me, so I was nervous I wouldn't be able to get much. To my surprise, I got all the fabric I wanted for less than $6! Michael Levine Loft is the best. You really have to search and dig, but it is totally worth it!


I got white chiffon and two matching red and black floral print chiffon. I love the alternating colors, and I immediately knew I would make a dress with flutter sleeves. 

My sloper pattern pieces! I use these for every project! They match my (old) measurements perfectly
I decided to make a wrap dress! 
I wanted it to be a true wrap dress with flutter sleeves and a circle skirt.


The bodice front required some adjustments once the dress was all put together. The waist line sloped downward way too much, so I adjusted it so the neckline would lay flat and not gape open. 


Close up of the flutter sleeves, the alternating colors of the fabrics, and the skirt. 

Don't mind our dead garden.. The wind blows so hard here, our sunflowers stand at a 45 degree angle!
I've been wanting to sew something with flutter sleeves for a long time. I've been wanting to make a true wrap dress for an even longer time! I'm so happy with how it turned out. If I were to make it again, I would make the skirt about 3" longer, and I would adjust the neckline so I wouldn't have to wear an undershirt with it every time. 
I still have a large piece of white chiffon from the LA trip, and I am definitely making something else with flutter sleeves. 

More Baby Clothes

Friday, June 17, 2016

When I visited my parent's house a while ago, I went through my box of handmade baby clothes. It is full of things I made in my children's clothing class in school that I have been saving for nephews, nieces, or my own babies. 
Here are a few of my favorite items:

Striped fleece sleeper


I made this weeks after learning that my sister was pregnant with her first child. I was so excited, and even though I didn't know if she was having a boy or a girl, I got to work on the baby clothes! This one turned out a little feminine, so it has yet to find a home. 

Strange towel bibs


These are so funny to me! I posted a picture of Henry in one of these bibs a while ago. I made a bunch of them because they are so easy to make and convenient to have around. I have yet to decide if they are the most practical design for a bib...

Newborn cap and booties


Classic newborn cap and booties. I've made a few sets of these for baby showers throughout the years. They, too, are easy to make and so cute on little newborns!

Theme by: Pish and Posh Designs